There is a "traveling" version of Jinny's quilt shop here at the seminar. I finally had time to go on a fabric hunt! I could be wrong about this, but I think that Jinny has 150 luscious colors currently in print. The colors sparkled!
Some of these fabrics are like old and dear friends to me. I used Jinny's fabric in my quilts since I was a new quilter.I was happy to find new fabric "friends"to go home with me.
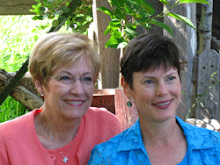
Here's Karen Stone, who stopped shopping just for a minute so that I could take her picture.
This is my classroom at the Jinny Beyer Seminar at Hilton Head Island. We're at the Marriott Resort and my space is part of the bigger ballroom. The partition walls are floor to ceiling which is nice. This is yesterday's Lorna's Vine class hard at work.
This afternoon I went with Karen Stone and Alex Anderson to the Needlepoint Junction - a local yarn and needlework shop. I love yarn shops - it's like being bombarded with color. The textures are so luxurious!
I almost bought some of this wool sock yarn - until I remembered that I have a lot of sock yarn at home that I really should knit up first - someday, when I'm not appliqueing.
But then Karen spotted some very fine lace wool. I don't have any of that! I bought a skein of muted greens and golds that will be fun to knit into a shawl.
It's still gray outside and as I've been typing a light rain started to fall. The color of the yarn in these pictures is a lovely contrast to the scene outside my window.
There are record numbers of quilters here for the final Jinny Beyer Seminar - and, happily, I'm one of them. Everyone is smiling!
Early classes started yesterday. I taught an all-day Lorna's Vine class and will repeat it today. Not too many were out walking on the beach yesterday because it is chilly and windy. There is, however, a lovely soft gray view of the beach, ocean, and sky.
I hope to have time today to take pictures of quit-related sitings for you!
I've been playing with the new camera. Boy, is it a nice piece of equipment! These are a few of my outdoor bird houses. Steve made the ones on this post several years ago. He didn't paint them blue, I did. Color is good!
Birds have never lived in them but the wasps like them a lot. Our driveway is at the back of our house on an alley. This bird-house-post is at one corner of the driveway, across the way from the new raised beds.
Steve's brother, Charles, is a dentist in Oklahoma City. He made this marvelous bird "hotel" birthday present for Steve and me.
We mounted it on what is a ladder to nowhere. (It is actually all that remains of what used to be a climbing structure for kids.) I hope the birds love it. Charles - you did great!
Here's an update on the raised vegetable beds we're building. We filled the beds with a mixture of soil, compost, expanded shale, and other organic additives that I can't remember. You might notice that my hair in the photo is even shorter these days. I'm loving it!
I hope that we have time tomorrow to install the soaker hoses. I'm getting ready to leave for the Jinny Beyer Seminar on Sunday and I'm running out of time to get it all done.
I have high hopes that we can grow a lot of vegetables in these beds. I'm certainly having fun going through the seed catalogs!
I've had some questions about the kind of camera I use for the blog. I've been using this 12.1 mega pixel Canon PowerShot SD950 IS. It's a camera that fits in the back pocket of my jeans and it takes amazingly clear photos.That said, I have needed a more professional camera for photographing quilts.
This week I got a Nikon D90. It's pretty amazing. My husband, Steve, will be the one of us that take the time to figure out everything this camera can do. I have figured out how to turn all of the features to their automatic setting. So far that's working for me.
I decided yesterday to test the camera on my (moving) grandson under the fluorescent light in my studio combined with daylight coming in the door. I set the camera to auto and the sports setting (that's the one that uses a really fast shutter speed).
Jack did not pose for any of these shots. He was in motion. I'm happy because it's really hard to get a picture of this boy - he never stops moving.
It is my hope that you'll see even better pictures on our site now.
I found this slide show at Abbey Goes Design Scouting. Eric Testroete took the photos from his trip to Japan and made a slideshow/video from them and set it all to music. Each image flashes by so fast that individual shots are hard to pick out, but the overall impression is pretty cool. The Vimeo site looks easy to use.
Imagine, if you had the discipline to photograph all the steps that went into making a quilt, you could build one of these slideshows and, perhaps, see the process in a new way. Or you could take a photo a day of your child (or children) and watch them grow. Really, I need a lot more time!
Saturday, January 17, 2009
I received the following email from Dena today:
I am having a Piece O' Cake dilemma and could use your advice. I'm appliquéing a block that will have both regular appliqué and reverse appliqué on the same piece. Your books & DVDs are still in storage so I can't refer to them for the convex & concave process (and I just can't recall which comes first).
Should I appliqué the outside circle first or the reverse appliqué on the inside first? The background and inside the design are the same material.
Thank you for any help!
This was my reply, and I see now that I need to add a bit more info:
Hi Dena:
I wouldn't try to cut these shapes with their 1/4" seam allowances and then applique them. They'll be too prone to stretching.
I'd make a finished size template of each piece and trace that on either a square or rectangle of fabric that is about 1" bigger on each side than the shape you are working on. I'd do the applique, press, and then cut out the shapes (with their seam allowances) and sew the quilt together.
You'll waste some fabric this way but it will be a whole lot easier to applique.
And here's some additional info: I would generally do the reverse applique first but that could change depending on the specific design. When sewing concave and convex curves together, sew with the concave (inner curve) on top.
I'm sorry - I've been so busy that I've forgotten to blog. I have no excuses. So, what have I been doing? I've been learning QuickBooks (which Linda knows inside and out, but I do not). I've been machine quilting, but not as much as I should. I've been working on supply lists.
I've been preparing for the LAST Jinny Beyer Seminar in Hilton Head. I am so thankful that I was asked to teach for her at this event. I hope to see some of you there! Karen Stone is teaching too (among others) and I'm looking forward to getting to visit with her.
Steve and I are building raised beds. Steve has access to lots of cedar trees that need to be cut down. So he went out with his trusty chain saws (the big one and the less-big one) and slayed some - it was economical and green.
Late this afternoon we got the first load of soil mix and I was shoveling. It's going to take a little more than 3 pick-up loads.
I hope each and every one of you has had a good week and, as Arnold says: I'll be back.
Hello everyone! I have been tweaking my class page online in the hopes of making it even easier to read. I've just begun posting my supply lists with the classes. (That's sort of an over-statement as I have only posted 2 supply lists.)
If you are like me, you want supply lists to be accurate, easy to understand, and only list the items that must be brought to class. If any of you have time to look at the "Sewing Sunny Flowers" supply list and furnish me with feedback, I'd appreciate it. You'll find it on Becky's Class Page, it's the first class listed.
Be as critical as you can be. I'd much rather hear it from you than from students when it's too late to fix it.
Here's another tip related to machine quilting:Once your quilt is quilted, you need to trim the outer edges of the quilt and then sew on the binding. When you trim, leave about 1/4" of batting and backing fabric beyond the edge of the quilt top itself.
The raw edges of the binding are placed next to the raw edge of the top. The extra batting and backing will fill the binding nicely.
I like to "sign" my quilts as I quilt them. I load my machine with a slightly heavier thread (like King Tut) in a contrasting color. I do my best to capture my actual signature. I do also sew a documentation patch to the back of the quilt.
There were a variety of questions asked about my post on January 7. I'm happy to answer them here,
For free motion quilting, I believe that practice does indeed make perfect - or at least practice makes you a lot better. Classes and books may point you in the right direction, but without practice on your part, you will never quilt as well as you want to.
When I was a new machine quilter I practiced on quilts that I gave away. This allowed me not to stress out over mistakes. Don't machine quilt on quilts that you care deeply about until you can trust yourself not to ruin them.
Get a sewing machine that will do what you need it to do. Men have always known that if there is a tool you need for a particular job, you get the tool. You need a good sewing machine (we are Bernina girls). And you need the table that it sits in.
I use cotton thread when I machine quilt. I'm a big believer is using the same fiber throughout the quilt and I don't like (or trust) polyester thread. When I want the quilting thread to stand out on the quilt I use Superior's King Tut or Mettler's 50-weight silk-finish thread. When I want the threadwork to be more subtle, I use Superior's 50-weight Masterpiece, Aurifil's 50-weight cotton (which we have on sale until it's gone), Mettler's 60-weight cotton machine embroidery thread, or DMC's 50-weight thread.
This quilt has Fairfield's Bamboo batting. I like it a lot! It has some cotton and bamboo is a "greener" plant fiber so I am happy to use it. If I wasn't using that, I'd use a 100% cotton batting - Hobbs and Quilter's Dream both have good batts.
Here's a tip that you won't enjoy hearing, but it will help. If you make a mistake in your free motion quilting, stop and fix it right then. What usually happens to me is that I'll stitch up onto my applique when I wasn't supposed to. Rather than hope that no one will ever see this mistake (because it will be the first thing that people see) I stop, cut my thread, bury the tails, and begin again. I don't like doing it, but I do it. Every time. Eventually I slow down and am more careful.
And here's another tip that you may not want to hear, but I feel compelled to share with you: Strengthen your upper body! I always bring this up in class because I found out how important it is. I have osteopenia (not quite oseoporosis) and my doctor told me that I had better do weight-bearing exercises or I would be a bent-over little old lady some day. I walk 3 miles a day, 5 days a week; lift weights 3 times a week (for 1/2 an hour); and go to a 1-hour pilates class 2 times a week. I am not superwoman but I can really tell a difference! My back hurts less often, my posture is better, and I have more control when I machine quilt. Walking alone did not do this - it's the weights and pilates.
I used to be afraid to go to the gym. I was sure that I would stick out and be embarassed by my out-of-shape body. That has never happened. Most of the other folks at the gym are normal people with the same issues I have and they don't care if I'm wearing my mis-matched gym clothes.
If you are not exercising, now is as good a time as any to start. If you have never lifted weights, take advantage of the trainer at the gym so that you exercise correctly. If you are going to work out at home, consult your doctor first. You can hurt yourself if you lift with bad form. I started with really light weights.
Feel free to ask more questions in the comment section and I'll answer them as I can.
There's a lot going on here - but the news you are going to be interested in is that we are having a sale. I'm not going to go into great detail here. Visit our home page and you'll see the list of sale items at the top of the page.
I'm machine quilting the borders on the smaller version of Lorna's Vine. I'm "fracturing" the feathers.
It is entirely possible that other quilters have done this before me, but I don't remember seeing feathers done quite this way before. It's a fast way to fill the entire space with closely-quilted, feathery lines.
Click the photo to enlarge it. This is a blog feature that went away (I don't know why) and now it's back (I still don't know why). But it's nice to be able to see details better.
I'm just like you... I have to work at figuring out what sort of quilting design I want to use. I generally doodle to figure it out.
I begin by putting a piece of the clear upholstery vinyl (or other heavy-ish clear plastic) over the quilt I am working on. I doodle quilt designs with my ultra-fine point Sharpie on the plastic, which is laid over the quilt. (In this photo the doodled-on plastic is pinned to my design wall so that the picture is clearer.)
You can see how close I came to the edges of the plastic with my Sharpie. I'm not always as careful as I should be. If you are smarter than me, you'll cut your plastic bigger so that you do not run the risk of drawing on your quilt with a permanent marker.
In this example, the center flower was easy to come up with. Harder to decide on was the fill outside of the flower, mostly in the corners. I like the way this quilting design turned out.
FYI - If you hire someone to quilt your tops, this is an excellent way to share ideas with your quilter. Even if you don't draw well, you can doodle something that will help get your intentions across.
On Saturday it was practically hot here in north Texas. The high was in the low 80s - very unusual for us. Today, Monday, we're having a bit of freezing rain. Luckily the ground is too warm for the roads to get icy.
There are icicles growing on my bird feeder. The birds flew away when I was outside taking this photo, but they are back now.
BTW - I bought this squirrel-proof bird feeder from Duncraft recently and it is wonderful! The squirrels gave up after they slid off of it once or twice. All kinds of birds eat at Chez Goldsmith. And I am pleasantly surprised that there is not much uneaten seed falling to the ground.
So, I'm going to get back to work machine quilting. There are so many deadlines that I ignored during the holidays. Surely I'm not the only one who did that :-).
Happy stitching,
Becky
PS - Christy is out of the hospital and home. She's certainly better than she was and that's a good thing.
I hope you all are enjoying this holiday break as much as I am. Jeff and Celia are here in Texas with us until early Sunday morning. They've spent a lot of time figuring out how they want to decorate the church and the reception hall for the wedding next August. They are making prototypes that Steve and I (and friends) will be duplicating between now and then. It's going to be fun! The mother of the groom doesn't often get to be a part of this part of the wedding.
I don't know how many of you have old albums sitting around collecting dust but, for those of you who do, I want to show you this. Celia made me this folder from an old Captain and Tennille album.
She cut the top and bottom so that the cover opened up. The flaps are folded in and taped in place. Even though I was never a Captain and Tennille fan, I'm going to travel with this folder until it falls apart. It makes me grin!

 There is a "traveling" version of Jinny's quilt shop here at the seminar. I finally had time to go on a fabric hunt! I could be wrong about this, but I think that Jinny has 150 luscious colors currently in print. The colors sparkled!
 Some of these fabrics are like old and dear friends to me. I used Jinny's fabric in my quilts since I was a new quilter. I was happy to find new fabric "friends" to go home with me.
 Here's Karen Stone, who stopped shopping just for a minute so that I could take her picture.